How to Build an Excel Add-in
Easy Steps to Create a Basic Excel Add-in with User Defined Function
Ronald January 27, 2014
There are many examples on the web that explain the great benefits of User-Defined Functions and are telling you to store these in an Excel Add-in. But the part lacking is often the steps needed to create the add-in. This article will explain the basics on how to create an add-in with a user-defined function.
What is an Add-In and a User-Defined Function?
An Excel add-in can be seen as a spreadsheet containing macros, that runs in the background of Excel. Once an add-in has been added to Excel, it will be loaded everytime that Excel starts up. The add-in normally has the extension .xlam, .xla or .xll.
The typical use for an add-in is to make additional functionality available to the user, across all spreadsheets. The functionality is often added in the form of a User-Defined Function or UDF.
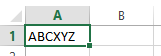
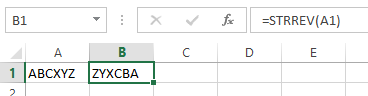
Let's make our own add-in and add functionality to Excel to reverse a string. As an example of new functionality, we have the string "ABCXYZ" and would like to get to the string "ZYXCBA". This is not something that can easily be achieved with Excel's built-in functions. Fortunately, add-ins can help us out here.
The Steps
Start with a blank new workbook in Excel.
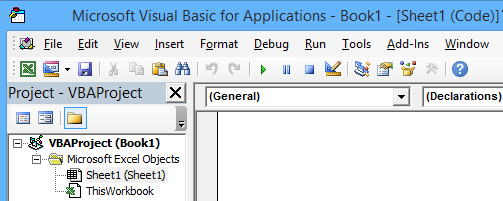
Open the Visual Basic Editor by pressing Alt+F11. There are other ways to open the Editor, but this by far the easiest way.
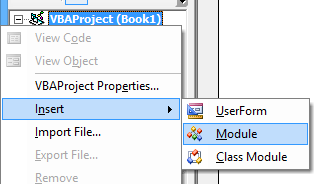
Now right-click on the project on the Project Explorer on the left side and choose Insert > Module. Alternatively, choose Insert in the main menu and select Module.
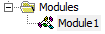
The new module will now show up in the Project Explorer.
It’s time to finally add the code for the User-Defined Function. We are going to use the StrReverse function built into Visual Basic to reverse the string.
Function STRREV(str As String) As String
	 STRREV = StrReverse(str)
End Function
The next step is to save the Excel workbook as an add-in. If you only use Excel versions higher than Excel 2010, then save as Excel Add-In (*.xlam), else choose for compatibility Excel 97-2003 Add-In (*.xla). The path to which Excel will save will change to the Excel Add-Ins folder. Typically this looks like C:\Users\{user}\AppData\Roaming\Microsoft\AddIns.

The last step is to instruct Excel to always load the add-in. Go to the Developer ribbon and click on the Add-Ins button. You will now see the add-ins that are present in the default Excel Add-Ins folder. To always load the add-in at startup, put a checkmark in front of the Add-In’s name and click OK.

You can now test the new User-Defined Function by entering the formula =STRREV(A1) in a cell. The result will be calculated using the new functionality you’ve added to Excel.
Congratulations, you’ve created your first Excel add-in.